This section will take you through the process of creating a complex haptic effect to match a WAVE file. This process involves several steps:
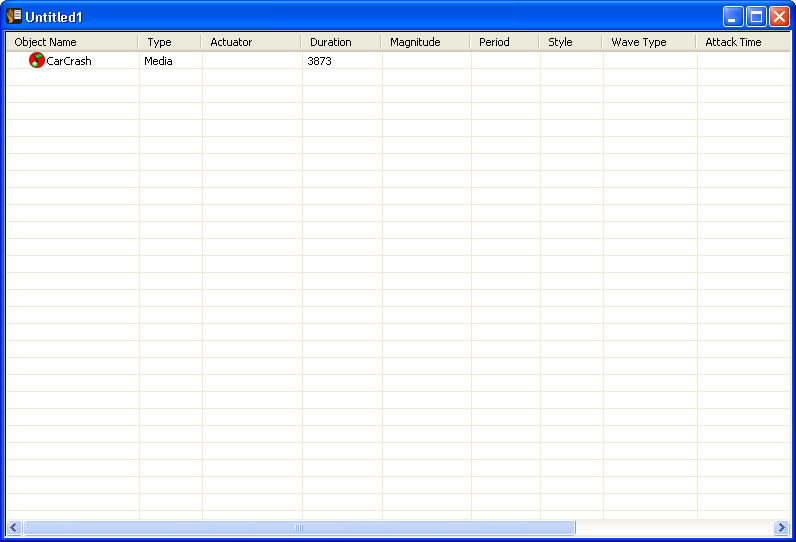
To insert a WAVE file into your project follow these steps:
Note: You can also use the Toolbar button
 for inserting multimedia
files. For more information on the Toolbar, refer to the
Graphical User Interface
section of the documentation.
for inserting multimedia
files. For more information on the Toolbar, refer to the
Graphical User Interface
section of the documentation.
This step can be very subjective as different people may think some aspects of the sound are more important than others. There are, however, some key items to think about when listening to a sound for haptic content:
Keeping these points in mind, open the sound's Editor window and play the effect.
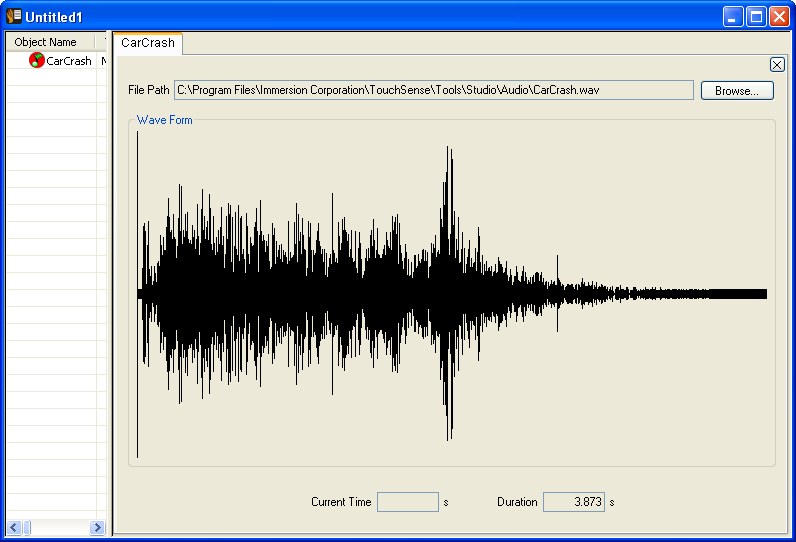
As mentioned previously, different people may find different parts of the sound to be more or less important, but here are a few features of this sound that probably should have haptics applied to them:
The first feature to create an effect for is the initial thud. This should be a strong vibration with a very short duration. For this, a MagSweep effect will be created.
To add a MagSweep to the project, either select New-->MagSweep from
the Edit menu or click the MagSweep
 button on the Toolbar.
To change the effect name,click on it once to select it, then a second time to enter a new name. Type "Thud" for the effect's new name and hit the <enter> key.
Double-click the "Thud" effect icon to open the MagSweep Editor window.
Your screen should now look like this.
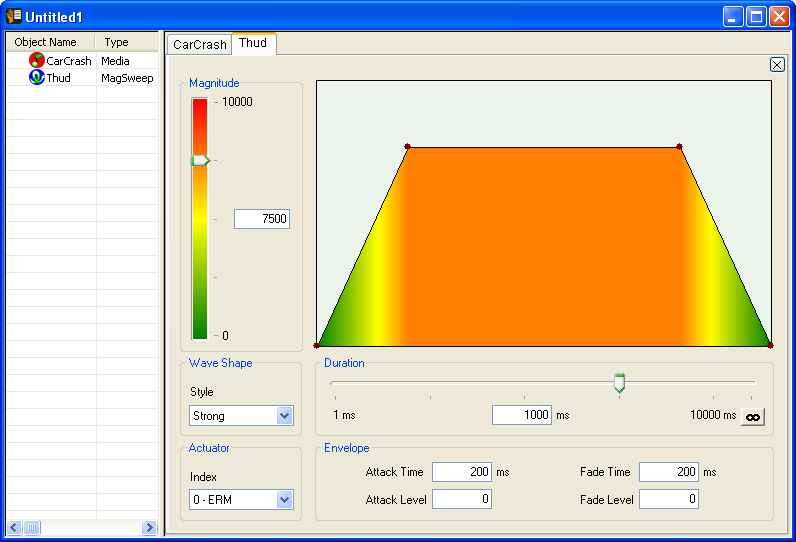
Note Each parameter is set to its default value.
Since the initial thud is very loud and abrupt, we need the matching effect to be strong and equally abrupt. First, make the effect's magnitude the maximum setting (10000). Since the thud does not grow or fade in time, we do not need to shape the effect with an envelope. So, set the Attack and Fade Times to 0. Lastly, the thud is over with very quickly, so we need to make the duration very short. 150 milliseconds should do nicely (we can always change this to more accurately match the duration of the sound effect later).

The next sound feature we need an effect for is the tire squealing. This
high-pitch, shrill sound calls for a high-frequency periodic effect. To
add a Periodic to the project, either select New-->Periodic from the
Edit menu or click the periodic
 button on the Toolbar. Rename this effect to something meaningful, like
"Tire Squeal."
button on the Toolbar. Rename this effect to something meaningful, like
"Tire Squeal."
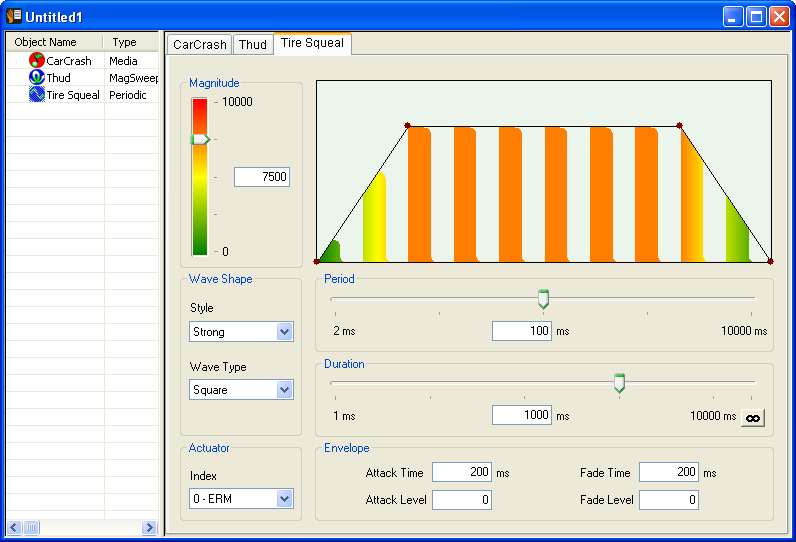
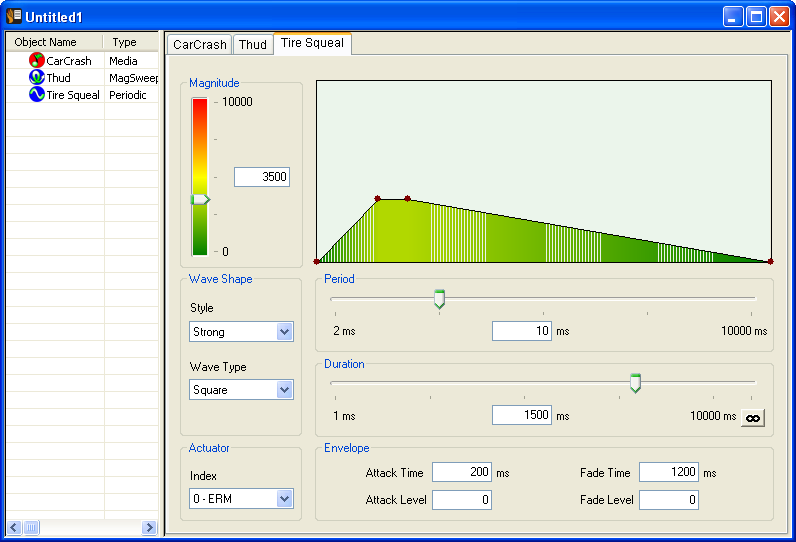
Double-click the "Tire Squeal" effect to open the Periodic Editor window. You should now see a visual representation of the periodic effect with its default parameters.
Play the effect a couple times to see what the default effect feels like.
Since we need a high-frequency vibration, change the effect's period by adjusting the slider to the right. Set it to about 10 ms. This should give us a nice shrill vibration. Next, adjust the Duration. This doesn't need to be exact because we will change it in the next section. For now, just set it to about 1500 ms (1.5 seconds).
Now, since the tire noise starts loud and gradually fades away, we need to give the effect a similar shape. Set the Attack Time to 200 ms and the Fade Time to about 1200 ms. Leave the Attack and Fade Levels at 0.
Lastly, this vibration should not be nearly as strong as the collision, so reduce the Magnitude to about 3500.
At this point, your screen should look like this:
The third sound feature we identified was the noise generated by the impact of the collision. This is similar to the initial Thud, but it is somewhat louder and lasts a little longer. Here, you have a choice to make. You could either create a new Periodic or MagSweep effect for this collision, or reuse an existing effect. Since we need a very strong, abrupt effect, we can reuse the Thud from before. The steps involved in reusing an effect are explained in Step 5. For now, we just need to make a mental note that we are reusing the Thud effect for the collision.
The next feature is the ending of the tire squeal. We do not need to make a vibration to correspond to the lack of squealing, so just make another mental note that the squealing ends at about the same time as the collision.
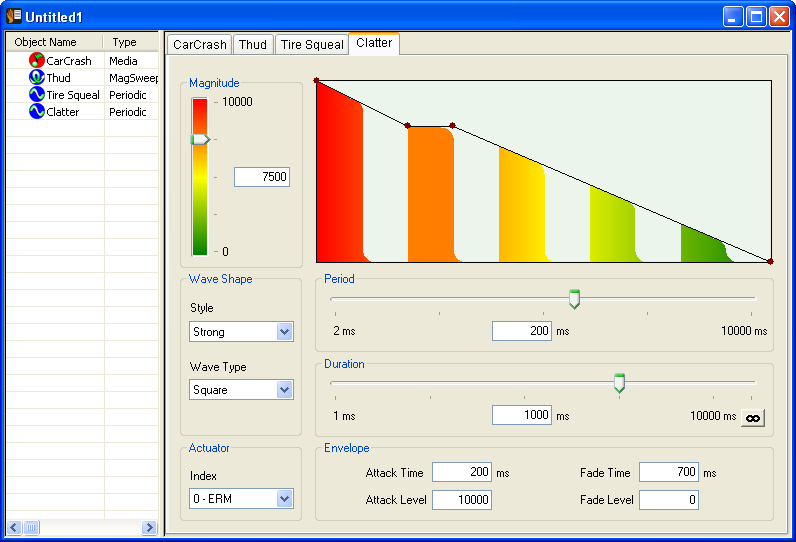
The last sound feature is the clatter and clashing of metal following the collision. If you listen closely, this sounds like a repetition of several clunks and clangs, which may be reproduced effectively by a low-frequency Periodic effect. So, add another Periodic to the project, name it "Clatter" and open its editor window.
Set this effect's Period to about 200 ms, but leave its Duration and Magnitude values alone (the default values are good for a starting point). We do, however, need to modify the effect's Envelope. The clatter in the sound is like a repetitious continuation of the collision. It starts relatively loud and gradually fades. Set the Attach Time to about 200 ms and the Attack Level to full-strength (10,000). Then, set the Fade Time to 700 ms and the Fade Level to 2500. This should give us a fairly gradual decay to match the sound.
At this point, the Clatter effect should look like this:
Now that you have all the Basis Effects designed, we need to build a Timeline so each effect can be synchronized with the sound.
To create a Timeline effect, select New-->Timeline from the Edit menu,
or simply click the  Timeline button on the Toolbar. Rename the Timeline effect to "CarCrash
Timeline" to make it easier to identify this effect later, then double-click
it to open the Timeline Editor window.
Timeline button on the Toolbar. Rename the Timeline effect to "CarCrash
Timeline" to make it easier to identify this effect later, then double-click
it to open the Timeline Editor window.
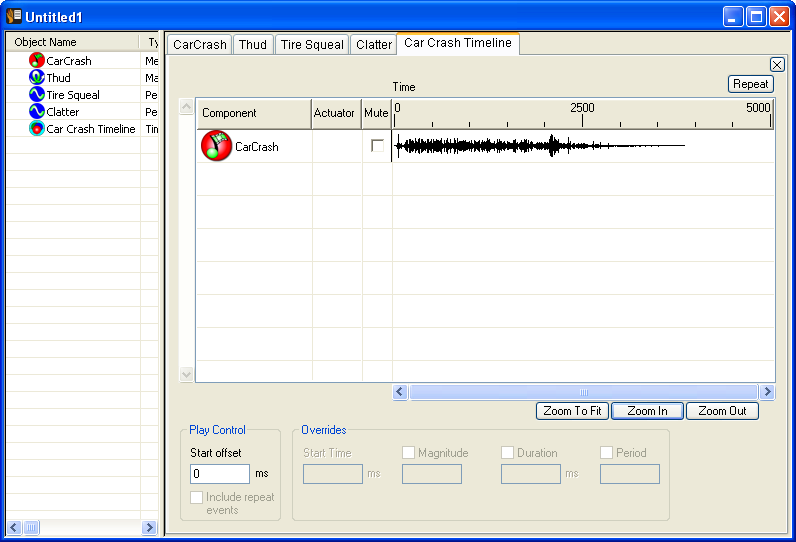
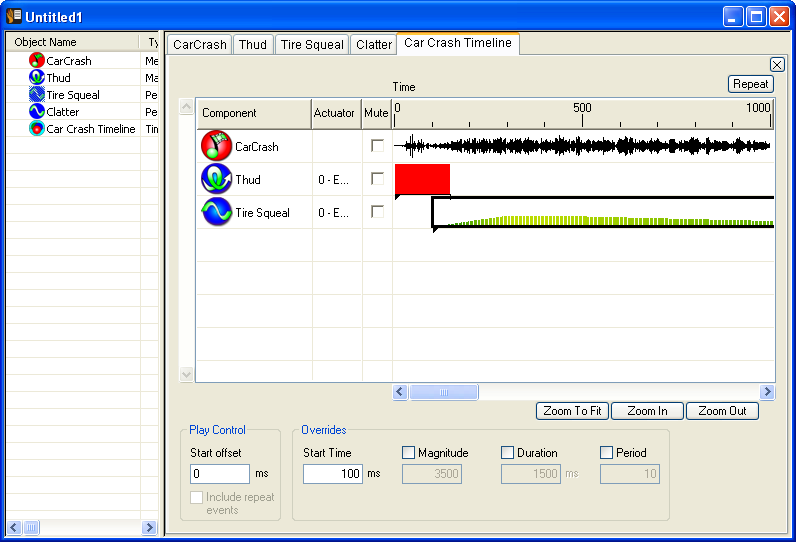
Your screen should now look like this. As you can see, the Timeline is empty.

First, add the sound to the Timeline by dragging it from the list view on the left into the Timeline's Preview Area on the right. Click anywhere in the Timeline editor to activate it, then click the Play button. You will see the Play Cursor move across the screen as you hear the sound play.
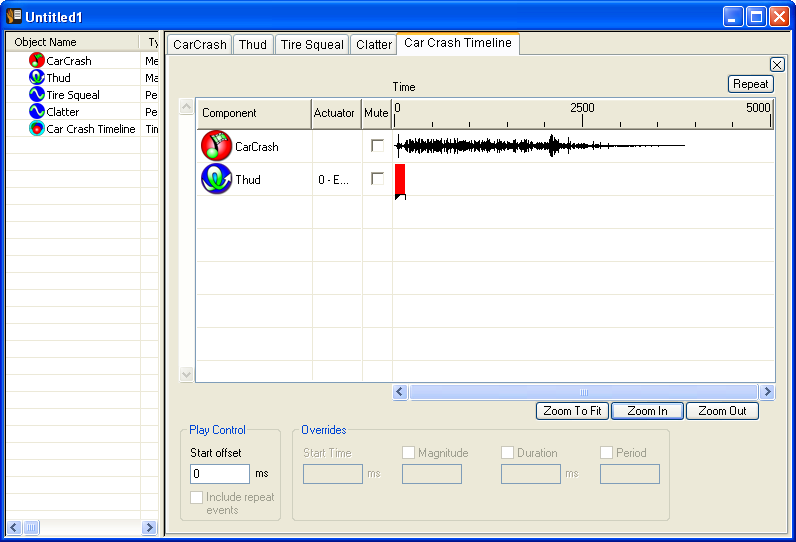
Next, add the "Thud" effect by dragging it into the Timeline. Since we want this effect to begin immediately, there is no need to change the Start Time.
Now, add the "Tire Squeal" effect. This time we need to change the Start Time, because the tire sound doesn't begin right away. To help us position this effect, click the Zoom In button twice so you can see the beginning of the wave form more clearly. Use the mouse to drag the Tire Squeal effect to the right to where you see the amplitude of the sound wave start to ramp up. This is at approximately 100 ms. To set the Start Time to an exact value, use the edit field in the Overrides area below the Preview Area.
Click the Zoom to Fit button so you can see the entire timeline again.
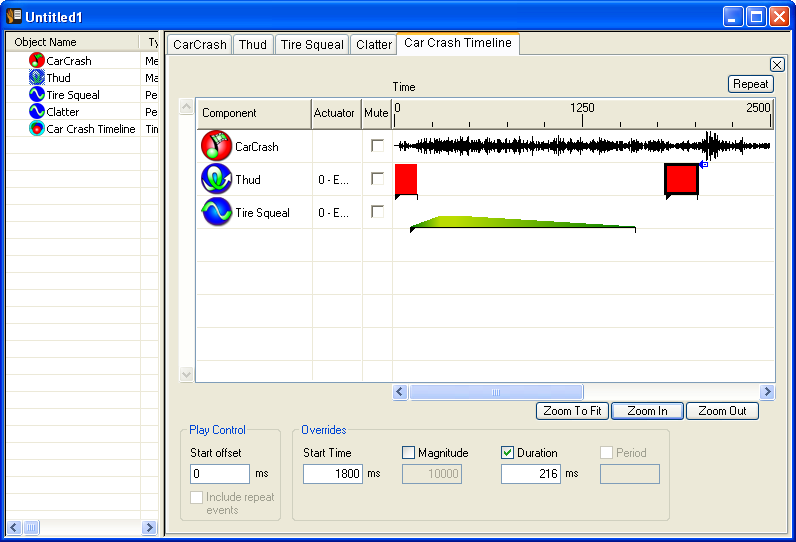
Now we're ready for the collision part of the effect. You may recall from a Step 3 that we can reuse the Thud effect for this purpose. All we need to do is create another copy of the Thud effect and position it in time. To do this, simply press the mouse button on the Thud effect's icon in the Timeline and drag the mouse into the Preview Area. As you drag, you will see a dotted rectangle. This rectangle represents the place where a new instance will be inserted as soon as the mouse is released. Move the mouse so the dotted rectangle is near the middle of the Preview Area and release the mouse button.
At this point, you may want to take a moment and review the documentation on Editing in the Preview Area.
Since the collision noise lasts longer than the initial thud, we need to edit the Override parameters to make it slightly longer. Use the mouse to drag the Duration handle (at the right edge of the new Thud event) to the right to lengthen the effect (216 ms should do nicely). Also note that when dealing with short effects (less than 1/2 a second), the strength of the effect you feel is affected by the duration. This is because the motor in the device may take a moment to "spin up" to its maximum strength. So, a very short effect may not reach its full strength whereas a slightly longer effect might.
Now, position the Launch Event by dragging the entire effect to about 1800 ms, or simply type 1800 in the Start Time edit field.
If you play the effect at this point, you may notice that the Tire Squeal effect ends before the squealing noise. This is one case where a good haptic effect may not exactly match the sound. As was mentioned earlier in this tutorial, empty space in a haptic effect can be just as important as the vibrations. For this effect, we need the collision to feel as strong as possible. One way to do this is to impose some dead space just before the collision.
The last effect to add to the Timeline is the Clatter effect. Drag it from the List View into the Timeline as you did with the other effects, and edit its override parameters so that it start at about 2000 ms.
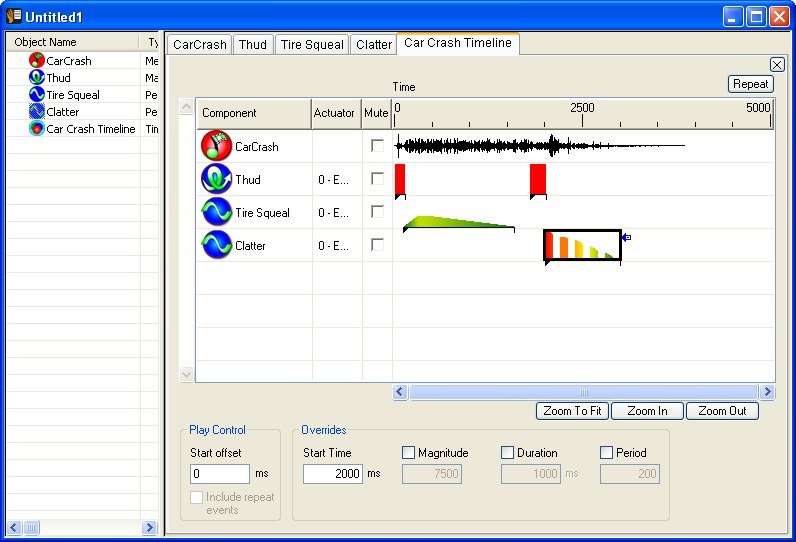
Play the complete Timeline effect a few times and make any final adjustments. For example, the duration of some effects may need to be slightly longer or shorter. Or, maybe something feels too strong or not strong enough. In this case, you may choose to use the Magnitude Override to increase or decrease a particular effect's strength.
Immersion and
are trademarks of Immersion Corporation.
All other trademarks are the property of their respective owners.
© 2010 Immersion Corporation.
Visit developer.immersion.com
for the latest in
news and information.